editorial product photography of life of lock on photo album

How to Protect Your Images

It all starts with a gasp. A tightening of the chest, prickly skin, perhaps even a cold sweat.

No!

What happened to my images?

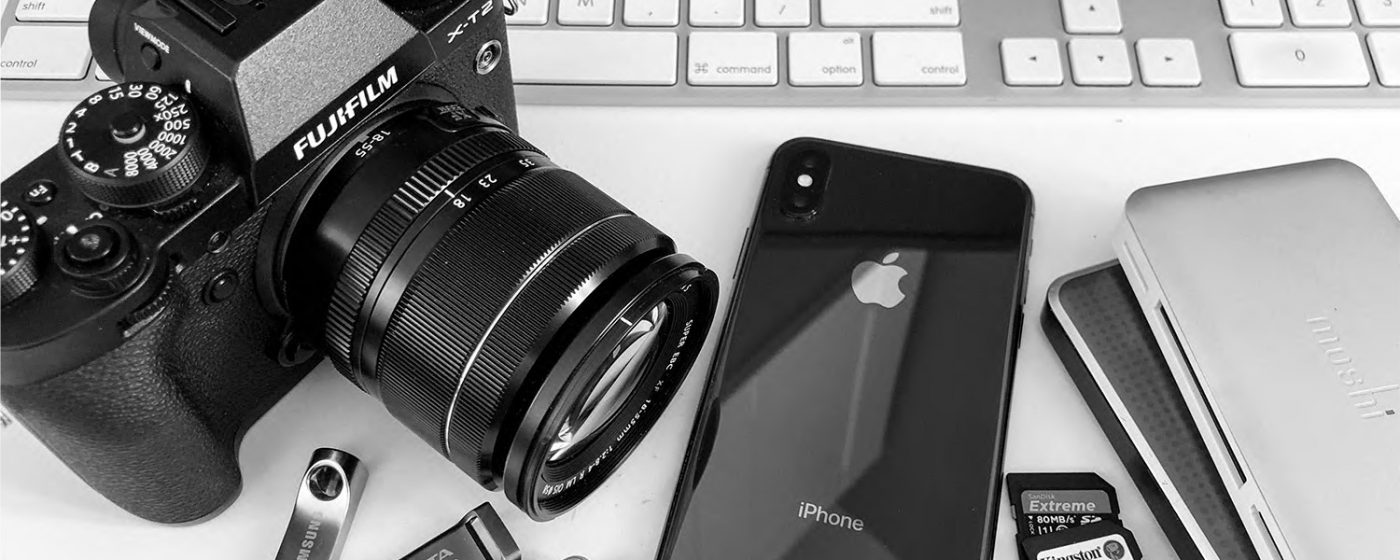
If you are like me, your smartphone is never far from your hand and you take pictures daily. Sometimes it’s just a shot of a pretty flower or interesting shadow. Other times it’s something you don’t want to miss, a reunion with friends, a child’s first step. Whatever the images on your phone, they are important and precious. What if your phone suddenly died? What if you no longer could view your images? It’s almost incomprehensible. Not to worry, there are simple ways to protect your images from loss.

The most important thing when it comes to your images is to make sure they are backed up to some device other than your phone. Phones get stolen, they get lost, and yes, they get dropped into toilets.

I have been a photographer since I was 15. I have taken many, many photos. You would think that I had my process down pat and that I was a paragon of virtue when it comes to backing up my images. Nope. I also get distracted by life and I put off the simple tasks well, because I would rather be out shooting. But I also know that it has to be done, so I make the time.

If you are ready to move forward, as the diagram below shows, it starts with getting your images onto your computer and the cloud. 

Graphic showing how to back up images


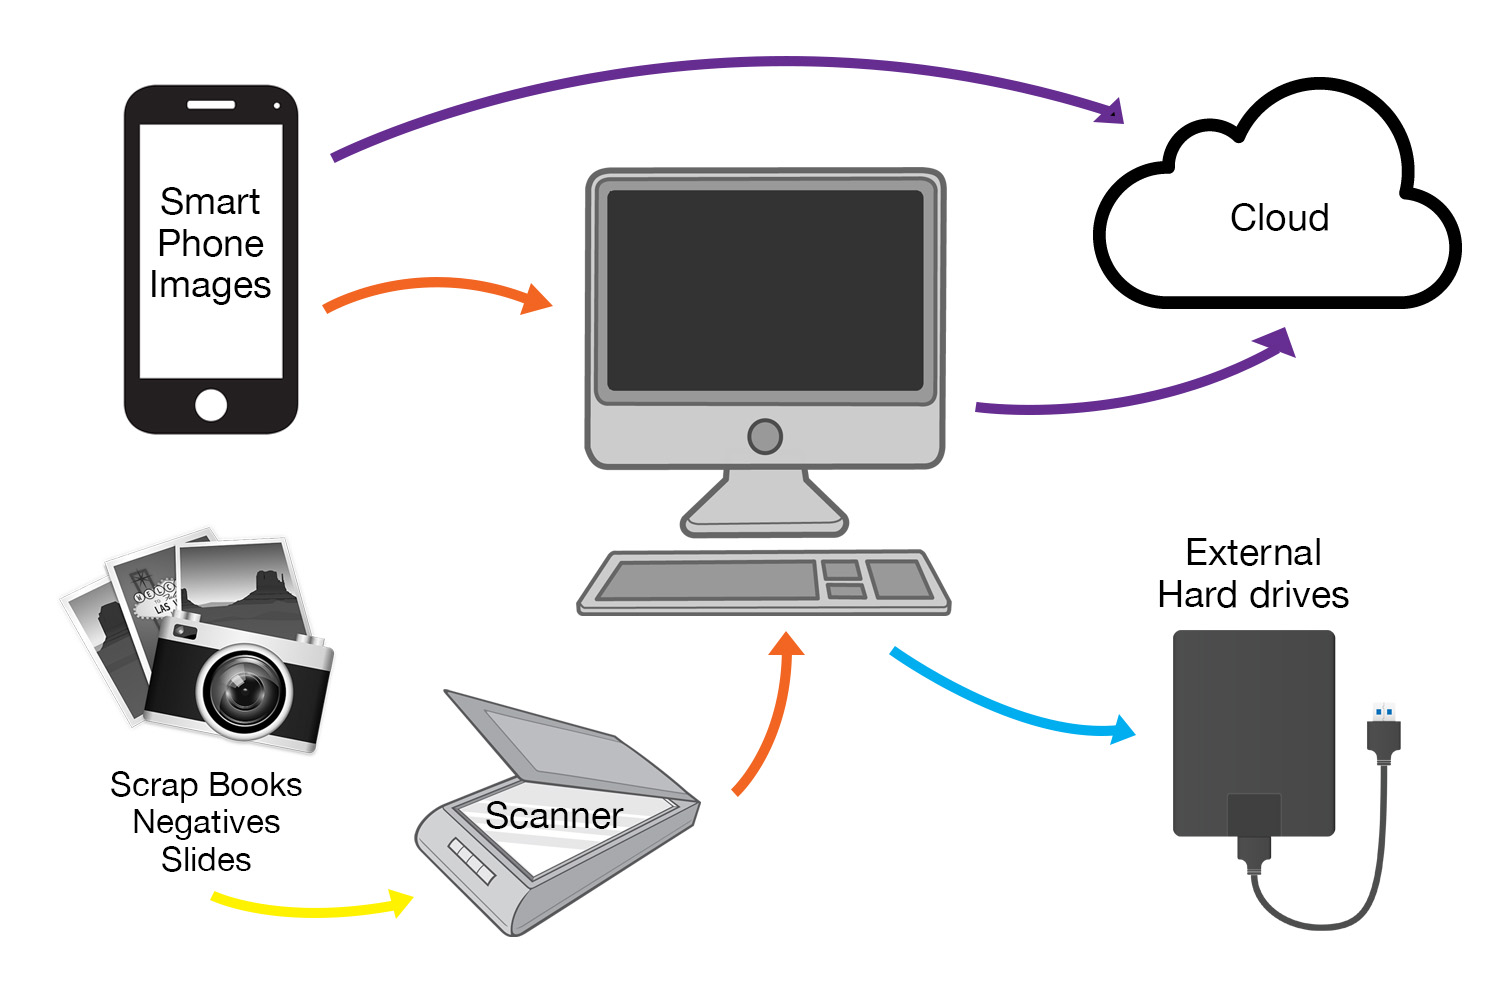
  1. Make sure the images on your phone are backed up to either the cloud or your computer. 
  2. Collect all your digital images from SD cards, hard drives and old computers and put them on a primary reliable computer.
  3. Scan all prints and slides from the era before digital and add the files to your primary computer.
  4. Back up all your digital images to your cloud account.
  5. Save a copy of all your digital files to one or two external hard drives. Regularly update these hard drives. Store a hard drive off site, either a bank vault or a friends place.

 Whew!

But before you pull a Flaming Elmo or run away, keep in mind that the extent of your photo management process depends on how you take pictures.

I like to think that there are three different types of photographers. I call them the Socialite, the Adventurer, and the Pro.

The Socialite

The Socialite likes to record her social activities and share them on social media but she doesn’t use any other type of camera. She may have photo albums from the distant past when she used a film or digital camera.

For the Socialite, making sure her images are backed up to the cloud and keeping a copy on her computer is a good start. Scanning her historic images, if she has any, is something she can do over time.

The Adventurer

The Adventurer takes pictures with her phone but she also has a digital camera and she travels with both. Sometimes she has hundreds if not thousands of images to deal with after her vacation. If she was organized in the past, she has many scrapbooks to show for her travels. 

She needs to gather all of her images onto her computer. She needs to copy her SD cards and scan her historical images into digital format. Once all her images are in the same place she can rename and organize them. From there she should save a copy to the cloud as well as an external hard drive.

There are many types of Adventurers and that will determine what software they use to manage their photos and how many places they back up their files. Some options are Adobe Lightroom, ACDSee, and Apple Photos.

The Pro

The Pro already knows what to do and isn’t reading this article. They are the Adventurer x10 and because they shoot for clients, there are legal and security protocols built into their process for managing photos.

Whatever type of photographer you are, the fundamentals don’t change when it comes to protecting your images. We all need to back up our photos to one or more places other than our phones to make sure they are safe.

editorial product photography of Still life of digital cameras

Where Can You Backup Your Photos

One of the essential steps in the process of protecting your photos is to make sure you are saving a back up of your images to the cloud or off site storage. But choosing the right photo management provider can be challenging. Here are a few tips to get you started.

The advance of smartphone cameras has allowed all of us to take as many pictures as we like virtually for free. But at some point, your phone will run out of space and the time will come to move the images into some form of backup system.

A lot of the confusion about putting images in the cloud is around the difference between a sharing platform and a backup storage platform. Facebook is a sharing platform and should never be used as a backup of your photos. Same goes for Flickr. 

Google, Apple and Amazon and storage platforms that also allow you to share. They each have their own rules and costs.

People have probably told you to save your images to some form of storage platform. But as smartphone technology continues to develop and the providers continue to change their offerings, it’s hard to keep up. Our kids laugh at our ignorance but the reality is we just don’t have the time to stay on top of who’s providing the best backup services. There are jobs to do, mortgages to pay, lives to live. 

Your choice of provider really comes down to the type of smartphone you and your family members use, how many and how big your files are, and finally, your budget.

Type of Phone

As we all know, the world of digital photography has totally exploded in the past 15 years. My first digital camera was 3MP. When Apple introduced a smartphone in 2007 it was 2MP. The latest iphone has 12MP and three lenses. Huawei’s smartphone camera can shoot 40MP. The technology keeps getting smaller, more refined and more powerful.

Even with all the advances, one thing has remained the same. Are a you a Mac or a PC? It’s not that Macs and PCs don’t like each other, it’s just that in the world of bites and bytes, like prefers to talk like to like. So, if everyone in your family prefers the iPhone and they have iPads and Macbooks, it can be easier to stick with the Apple platform and use Apple Photos as your provider. The same goes for Pixel smartphones and Google. This is not a hard and fast rule, just something to keep in mind.

Number of and Size of Your Images

Understanding your storage needs can get a little confusing. Most people simply shoot images and a little video with their smartphones. Others like to ramp up their video production and create high resolution movies. Some providers put limitations on video size and image type so knowing what you and your family like to shoot is important.

When it comes to knowing the size of your files, there are two numbers to keep in mind.

Image Resolution

The resolution of your images and the size of your images. Your smartphone camera resolution is defined in MegaPixels. That is how many millions of pixels there are in one image and the amount is determined by multiplying the number of horizontal and vertical pixels.

My iphone shoots 12MP. The image size is 4032×3024 pixels.  Which means each image has 12,192,768 pixels. We then say that the image (divided by 1 million or a mega) would be a 12.1 MP image.

However, that is not the file size of the image only it’s resolution. The resolution of an image is its quality, the more pixels in an image the smoother the lines, the better the colour and depth. But the higher the resolution of an image, the larger the image will be.

Image Size

The size of an image is defined in MegaBytes or MB or (10,000 Bytes).

Basically, to create a colour digital image, the sensor uses 3 colours per pixel. Each colour is defined as a byte.

So to determine the size of our image we need to multiple 12,192,768 by 3 which would be 36,578,304 bytes.

But that is too big to really talk about so we divide it by approximately 1000 (1024) to turn it into kilobytes (1000 bytes) and then divide again by approximately 1000 (1024) to get MegaBytes.

We then end up with a 34 MegaByte or 34MB uncompressed image.

But smartphones almost always shoot in a JPEG format which is compressed to save on space. So in actual fact the images on my 12MP phone average 3-5MB in size.

Storage Space

In terms of online storage space, Apple offers the first 5GB or GigaBytes (1000 MegaBytes) for free. So you would have to store up to 1000 images to reach that total.

Google offers the first 15GB  (15,000 MegaBytes) for free. That would be up to 3000 images for free.

But as I said, most people shoot images and video so the number and size of your videos will affect how much storage space you will need.

The size of video depends on resolution and how long the video is. Most providers will limit free storage to video that is shot at 1080p but many smartphones can now shoot at the much higher resolution of 4K. Google will compress your video to fit their requirements which could really affect your project.

In addition, all the providers allow you to back up more than just your images. Documents, music, and email can be included in the backup process and will add to your total count for storage. You can choose what you want to back up in the settings but it’s a good idea to back up all the files that are important to you. If you wanted to save money, you could just save your other files with a different provider or to a personal hard drive.

Apple Photos

If you are a Mac user then you will most likely prefer to use Apple Photos because it syncs so well across all the Mac devices, iPhone, iPad, MacBook etc. But what else is good about Apple Photos.

  • First 5GB free
  • Auto upload with wifi from your phone or iPad. Synced with your computer when signed into iCloud
  • Store images in the cloud and keep a smaller version on your phone to free up space
  • If all members of your family have iPhones you can create a family plan for about $4 a month/200GB
  • Share private photo albums with friends and family who have an apple id
  • Can create albums to organize your images and view them on both your phone and computer
  • Edits to images are synced across devices
  • Can view images on your devices through airplay and Apple TV
  • Apple One account allows you to upload photos, documents and more
  • Third Party printing options available through iCloud on your computer

How To Set It Up

Go to Settings on the Phone / Click on ID at the top / Click on iCloud / Turn it on and customize

Google One

Google One is a natural choice if you use an android device but it also works quite well with any device.

What has separated Google from the rest in the past was the free unlimited storage of your images. For the trigger happy photographer it was the best deal, so long as you only shot jpegs (what all smartphone cameras shoot) and were willing to keep the image size constrained to their specifications (less than 16MP – what most smartphone cameras shoot).

However, all of that will change as of June 2021 when they will no longer offer free unlimited storage. There rates will most likely be similar if not lower than Apple but it is something to keep in mind. Pixel 1-5 phone owners are exempt from this change.

  • First 15GB free
  • Need a Google account to upload images (free, comes with Gmail address if you have one)
  • Upload images easily through an app on your phone and wifi.
  • Available for PC and Mac users
  • Free up space on your phone by deleting images out of the proprietary photos app but you can always view them through the Google Photos app and wifi
  • Can upload images from your computer too through HTTPs://photos.google.com
  • You can share albums with anyone by sending out a link but that link is not necessarily private
  • Organize your images on the phone or computer with albums
  • Excellent face recognition, pretty good object recognition to help with organizing
  • No real printing options from the software
  • Google One is the family option – one payment for multiple accounts. Plans start at around $3 for 100GB, $4 for 200GB.
  • Any type of file, including gmail accounts, documents can be uploaded but all count toward your quota.
  • Paid accounts can be shared with 5 family members

How To Set It Up

  • Download the Google Photos App
  • Sign in with Google account.
  • App has to be open on your phone for automatic backups to the cl

Amazon Drive

We’ve included Amazon in this list because if you are an Amazon Prime member you get free unlimited photo storage and 5GB for other types of document storage. However, unlike Apple and Google photos, the sharing options are limited.

An Amazon Prime membership is around $110 CDN a year but you get movie and music streaming services and deals on shipping from Amazon.ca as well.

  • Best for people already paying for Prime and have family members who need to back up images too. Also, best for just cloud storage, not actual viewing, sorting, or editing
  • Backup on phone is automatic with the Amazon Photos app. On the computer, you have to use the Amazon Drive desktop app but you can set it up to auto-backup at certain times.
  • Available for both PC and Mac users
  • Organize photos by date or album
  • Share files only through social media
  • Files are private unless you share a link to them
  • Viewing and organizing images once they are uploaded is awkward
  • Printing is available through Amazon Prints but only in the US

In Conclusion

Once you decide on the best photo management provider for your needs, the set up is pretty straight forward. However, I do always recommend you back up your files and images to at least 2, better 3 places: The cloud, an external harddrive onsite, and an external harddrive offsite.

Happy Backing Up!

Graphic showing how to back up images